I tend to do some of my best cooking and baking when we’re staying at a place like this. Somewhere far from the lure of restaurants, tempting pre-made foods from Trader Joe’s or quick after dinner trips to the Yogurtland. Without all these choices unless you want to eat hot dogs and soup for weeks you better be prepared for some time in the kitchen.
Which, as anyone who knows me is sure to agree, is exactly how I like it. One of the things I love best about this new lifestyle we’ve created for ourselves is just how much time I have to spend in the kitchen. Instead of working till six, getting home close to seven and then throwing together whatever is quickest and easiest, I am right here with my kitchen close by (very close by) most days. If I want to make a stew that needs to simmer for three hours, or a bread that needs to spend 2 hours rising I can. Of course, as a trade off to having plenty of time to cook, there is that little issue of having very little space to cook in.
As you can see this a very tiny kitchen, with very little counter space. See that folded down counter to the left of the stove? That 12 x 15-inch space is all the room I have for food prep. Yup, that’s it. I can sometimes get away with putting a cutting board on the stove top, but if I’m using the burners then that option is no longer available.
You know what though? It works. It really does. I can honestly say that there’s nothing I couldn’t make in the Airstream that I could back in our large house-sized kitchen. It just takes a little more planning and sometimes a few modifications. I make a lot of one-pot meals, and if I am making more than one dish then they don’t always get cooked at the same time. I pare down recipes with fancy ingredients if we’re staying in a place (like out here) where more than the basics are hard to come by. I make dishes that can be turned into re-purposed leftovers for a second meal. I also utilize our outside grill a ton (for way more than just grilled meat).
In the spirit of all the time I’ve been spending in the kitchen, I though I should share some recipes. One of the things I love about making the southwest our winter home-base is the awesome availability of fresh produce. Even in January I can still find traditional summer produce like fresh tomatoes, zucchini and avocados.
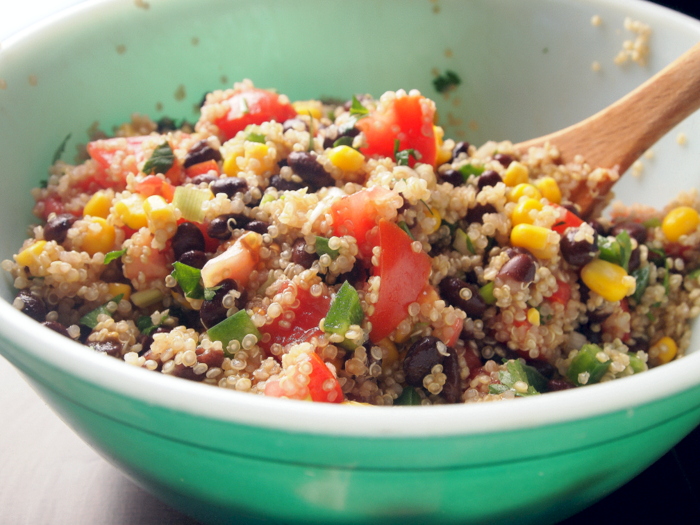
Last Friday we visited the small town Borrego Springs farmers market where we stocked up on citrus and veggies and even scored some amazing homemade tamales. I decided to put my supply of locally grown tomatoes to good use in this Quinoa, Corn & Black Bean Salad. I’ve been making various versions of this salad for years, but since good tomatoes are key to the success of the dish I usually only make it in the summer. Not anymore!
Quinoa, Corn & Black Bean Salad
Serves 4-6
- 1 cup uncooked quinoa
- 1 ¼ cups vegetable or chicken broth
- 1 can low sodium black beans, rinsed
- ¼ cup scallions, finely chopped
- 1 large tomato, chopped
- 1 ear corn, kernels removed and steamed (or 1 cup frozen corn, steamed)
- 1 jalapeño, ribs & seeds removed for less heat, finely chopped
- 1 tablespoon olive oil
- 1 tablespoon white wine or apple cider vinegar
- 1 teaspoon salt
- 1-2 tablespoons fresh lime juice
- ¼ cup fresh cilantro of flat-leaf parsley, minced (optional)
- In a medium saucepan bring the vegetable or chicken both to a boil. Add the quinoa, turn the heat down and simmer for 10 minutes. Remove from heat, fluff with a fork and let sit covered for another 5 minutes. After 5 minutes uncover and let cool to room temperature.
- In a medium size bowl combine the black beans, scallions, tomato, corn and jalapeno. Add the cooled quinoa and drizzle with 1 tablespoon olive oil, vinegar and the salt. Toss the ingredients together and season with 1 to 2 tablespoons lime juice, according to personal taste.
- Sprinkle with fresh cilantro or flat-leaf parsley if desired.
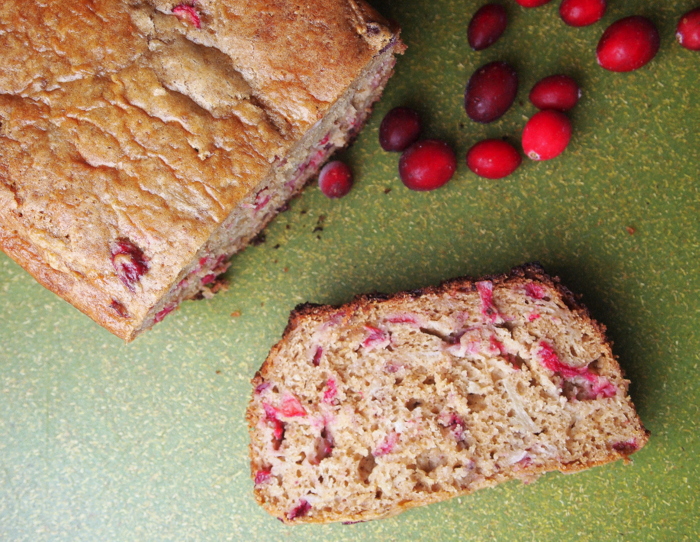
We had a few chilly days out here last week where the day time temps barely got into the 60s and it dipped below 30 at night. One of my favorite ways to warm up our tiny home is by baking something in the oven. This Cranberry-Pear Bread is also a long time favorite. One that I have simplified a bit, both in regards to ingredients and technique, for tiny kitchen baking.
Pear-Cranberry Yogurt Bread
Makes: one 8 ½ x 4 ¼-inch loaf
-
1 cup unbleached white flour
- ¾ cup whole wheat flour
- 2 teaspoons baking powder
- 1 teaspoon baking soda
- 1 teaspoon cinnamon
- 1/2 teaspoon ground nutmeg
- 1/4 teaspoon salt
- 2/3 cup brown sugar, packed
- 2 eggs
- 1/3 cup canola oil
- 2/3 cups plain yogurt
- 1 large pear, grated
- 1 cup cranberries, roughly chopped (or substitute an equal amount of dried cranberries)
- Preheat the oven to 350ºF. Coat an 8 1/2 x 4 1/2- inch loaf pan with cooking spray or wipe with oil.
- In a large bowl whisk together the flours through brown sugar.
- Make a well in the center of the flour mixture and add the eggs, canola oil & yogurt. Stir until just combined. Fold in the grated pear and chopped cranberries.
- Pour into the prepared loaf pan and bake for 50-60 minutes, or until a wooden tester comes out clean. Cool the bread on a wire rack at least 15 minutes before slicing.
I don’t have a picture of this next one so you’ll just have to trust me that it’s good, and good looking. This is a 100% one-pot meal. It is very simple, quick and tiny kitchen friendly.
One-pot Pasta with Sausage and Kale
Serves: 4
- 12 ounces pasta, any shape
- 1 pound turkey, chicken or pork sausage, casings removed
- 6 garlic cloves, peeled and minced
- ¼ teaspoon red pepper flakes
- (1) 28 ounce can diced tomatoes
- 1 teaspoon salt
- ½ teaspoon freshly ground pepper
- 3 cups water
- 3 cups kale, stemmed and chopped
- 4 ounces mozzarella, grated
- 1 ounce parmesan, grated
- Optional: Fresh Italian parsley, chopped
- In a large skillet (at least 10-inches) brown the sausage over medium-high heat for 5 minutes. If using pre-cooked sausage such as chicken or turkey chop before adding to the skillet and cook, stirring and flipping until browned all over. If using raw turkey or pork sausage remove the casings and crumble with a spoon or spatula as it cooks. Pork sausage tends to be high in fat, so be sure to drain the drippings before going on to the next step.
- Add the garlic and red pepper and cook for 30 seconds.
- Add the can of tomatoes with juice. Season with salt and pepper. Turn the heat down to medium and cook the tomato sausage mixture for ten minutes.
- Add 3 cups of water to the skillet along with 12 ounces of pasta. If using a 10” skillet the pan will be almost full. Cover and simmer vigorously, over medium-high heat, stirring often to prevent sticking, for 10 minutes.
- Uncover and add the chopped kale. Stir and replace the cover. Steam the kale until wilted for an additional 5 minutes.
- Add the mozzarella and parmesan mixing well. Cook for an additional 3-4 minutes or until most of the water is evaporated.
- Serve with chopped parsley and more parmesan if desired.
There you are, a small sampling of what we’ve been cooking and eating out here in the desert. I hope no one was too disappointed by the lack of landscape photos. I promise next time to make up for it with some (hopefully) stunning views from a hike we have planned for tomorrow.


7 comments
Thanks for the wonderful sounding recipes. Can’t wait to try them. We have been full timing in our 1981 Excella II Airstream for 3 years. My kitchen space is a tad bit larger than yours. It’s always amazing how much you can do in such a small space. Our travel blog is at mytripjournal.com/silvertrails and my quilting blog is at quiltingontheroadrver.blogspot.com. Have enjoyed following your blog.
Travel safe….Claudia
Thanks Claudia! Yes, it is amazing what you can get used to isn’t it?
Ooh that bread looks good. Is that the one you’re going to bake this week?
Yup, probably tomorrow when I get more eggs. It’s soooo good!
Hi, I have a question about your oven. I cook/bake very little in ours because it’s so small that if the oven rack is on the lower position, everything burns on the bottom. If it is on the upper position, nothing taller than about 2 inches fits. So how do you bake your bread without burning the bottom? Or casseroles, etc. Thanks for any advise!
Sounds like you have a smaller oven then I do. Mine has three rack positions and I always leave it in the middle. Have you tried a pizza stone or unglazed tile on the bottom? That has made a huge difference for me in terms of preventing bottom burning or uneven cooking.
I just read your post about 6 tips for using your oven. I tend to fall down the rabbit hole when I start reading your posts ( the You May Also Like ). . I am definitely going to try those! I think my oven is smaller, but I love to bake, so I’m hoping all these tips will help! P.s., we are not full timers, we just love to camp as much as possible, preferably dry camping, so I like your boondocking tips too, thanks!